Apple has added a built-in feature of screen record with the launch of iOS 11. So, now every device running on iOS 11 or later versions like iOS 12 and the new iOS 13 then, you can screen record on iPhone within a few clicks. Users can process screen recording and capture sound on the iPhone, iPad, or iPod touch. Recording screen on the iPhone is as easy as taking screenshots on the phone by pressing Home Button and Power Key simultaneously.
Earlier, there wasn’t such feature available by Apple. Users had to download apps like AirShou to screen on iPhone and other iOS devices. Even a few years ago taking screenshot was a big thing and now screen record on the iPhone has become just a next normal feature. But a lot of people don’t know how to screen record on iOS 12 or iOS 11 since to enable Screen Record you need to make changes in your iPhone settings. So here we have made a complete guide to make this procedure easier for you.
Turn on Screen Feature on iPhone – How to Enable Screen Record on iOS
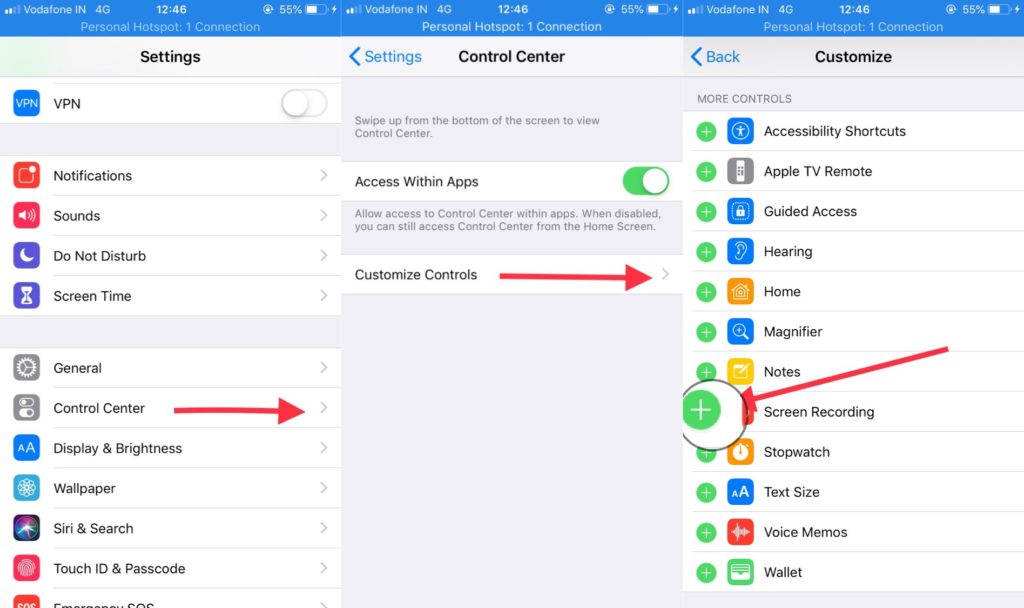
Step #1: Open your device Settings.
Step #2: Now navigate to Control Center => Customize Controls, and then click “green plus icon” next to Screen Recording.

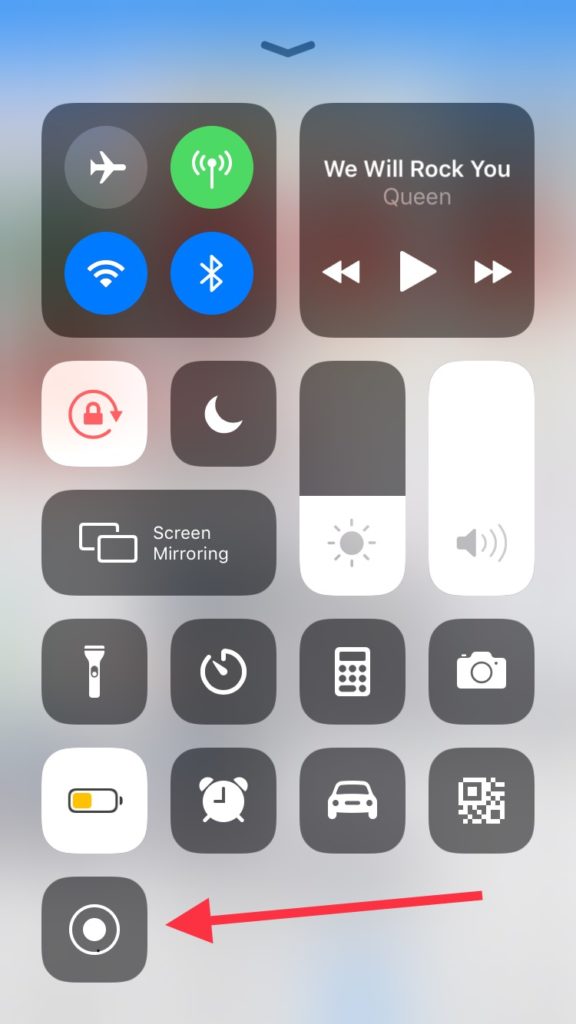
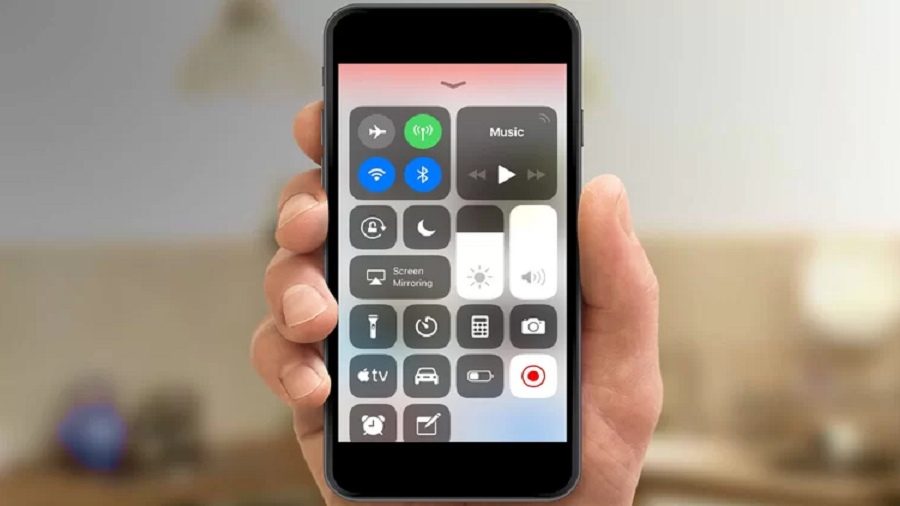
Step #3: Swipe up from the bottom of the screen of your iPhone to open Control Center. If you are using iPhone X or later or iPad with iOS 12 or later then to open customized Control Center, swipe down from the upper-right corner of the screen.

Step #4: You have to press on the “gray record icon” and tap Microphone if it is off.
Step #5: If you are using iPhone 8 Plus or earlier iPhone then Screen recording will start automatically after the 3 seconds countdown, in iPhone X and later tap Start Recording, then recording will start after the three-second countdown.
Step #6: Now navigate to the screen to record the video. If the app allows recording audio with screen recording then, the audio will also be captured. (Try this on YouTube)
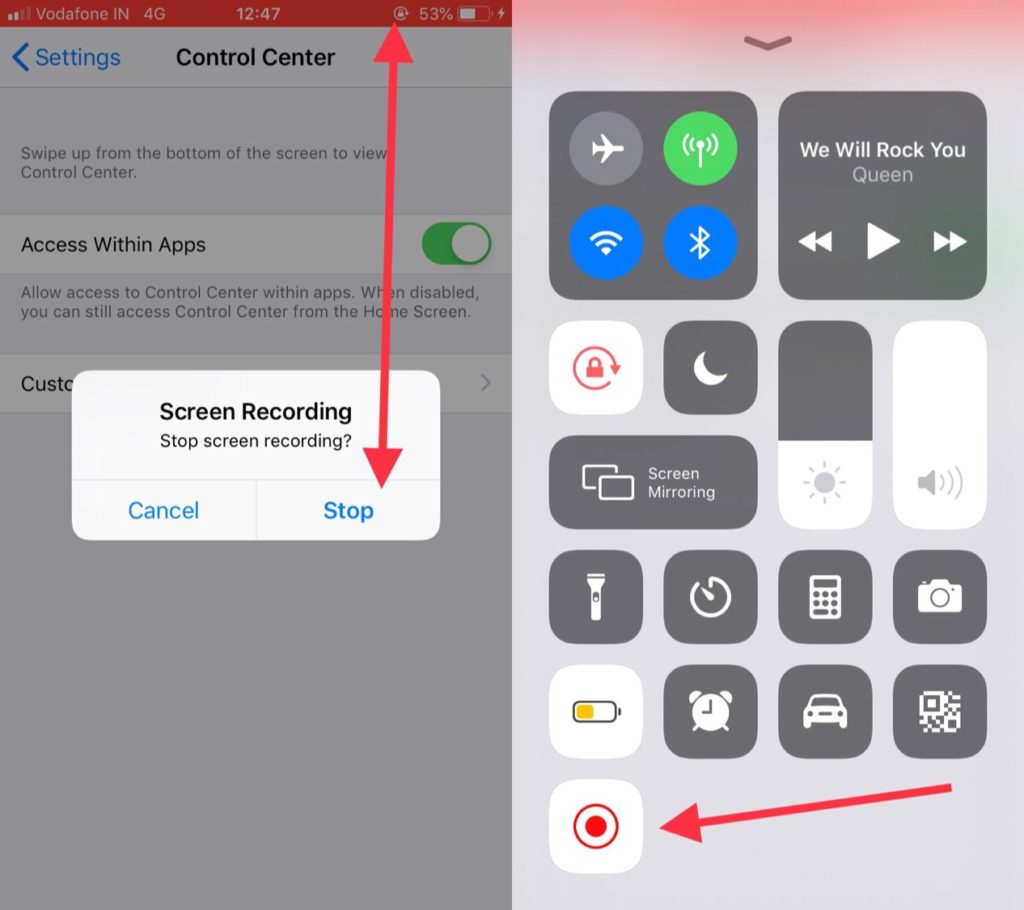
Step #7: To stop Screen recording on the iPhone open Control Center and tap red record icon or tap the red status bar at the top of your screen and click Stop on the prompt again.

Step #8: You can find the recorded video in the Photos app.
Note:
- Some apps like Netflix, Amazon Prime or such online streaming services may not allow Screen Recording on their apps from iPhone.
- Some DRM-protected online music streaming apps will not allow you to capture audio while screen recording o iPhone, iPad, and iPod Touch.
How to edit the screen recording’s video on the iPhone
As we said in the screen recording process that you will find the recorded video in the photos app. So if you want to use the video for any project or making a video guide then you can easily edit the video on your device.
- Open the video in the Photos App and click on the Edit on the top right corner.
- At the bottom of the screen, you can drag the arrow to adjust and trim the video so you can remove the unnecessary part of the video.
- Now tap on the “Done” option and then click on the “save as a new clip” so you can edit the file at any time.
Now, with this simple easy steps, you can screen record on your iPhone device and share the video on the social media apps or by email, you can use them you a tutorial guide or include it in your presentation or project.


