


If you have just bought the new iPhone 12 and want to know how to use the camera to get the best pictures then we are here today with some very good tips which can help you to get awesome photos using iPhone 12.
Best Tips To Use iPhone 12 Camera
Set up your camera
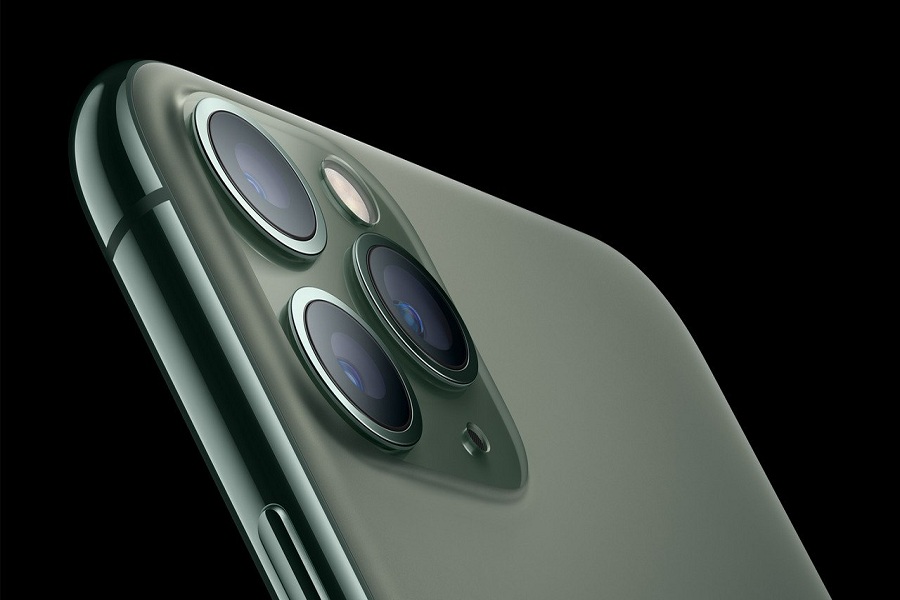
The cameras of the iPhone12 can be set before taking photos, so you can focus on your pic instead of adjusting your settings. It is worth taking the time to set the cameras and lock them,to avoid fighting with auto adjustments.
The bottom row of icons have different settings you can adjust before taking photo. Select if you need to turn the flash on, size you want the photo, level of zoom, and whether you need a timer. Try turning on the live-photo option to take multiple rapid pics of exactly 1.5 seconds before and after you hit the shutter. This helps to avoid photos getting ruined when someone blinks. Now choose the best shot of the bunch.
Check your surroundings
Spend some time looking at the scene and think about the arrangement of all the different elements in front of you and how they’ll look in your finished image. Adding elements in the foreground such as an interesting rock formation, a patch of flower could help tie the scene together.
Know when to go wide
The iPhone 12 has a superwide view built into its camera so it is important to remember to use these angles and know when it’s best to use them. Switching to the superwide can really change your image but it’s only worth using when you have a strong composition that actually needs the wide angle.
Use ‘night mode’ to brighten up night time pics
Night mode is important in taking amazing, clear photos in low lighting. In low light area night mode setting will automatically pop up. This night mode is available on all lenses. You can use night mode on the ultra-wide, wide,tele cameras and selfie camera as well. So now you can feel free to take some midnight selfies too.
Play around with filters and editing tools
A good edit can often be the main factor in turning an average snap into a dramatic piece of art. The basic edit button of Apple Gallery also lets you apply control highlights or cool filters or lift shadows, all of which takes seconds to do and can give your shots a boost. Do not zoom in too much because photos can start to look a bit grainy. You will also get less perfect pics if there is too much lighting coming from behind the subject and directly into the camera lens.
To make your picture more beautiful you can always add and adjust filters. Or use other editing tools to highlight a spot on the subject. Have some fun playing around with your options by mixing and matching different things. Remember there’s no right or wrong way to edit an image. You can always go back to the original image and start again if you don’t like what you’ve done so it is a risk free to experiment.