


StandBy is a hand down the best features of iOS 17 and also visually appealing. It is a new feature introduced in iOS 17 that transforms your iPhone’s lock screen into a customizable dashboard when charging.
Recently Apple released iOS 17.1 software update, and many users have raised concerns on how to use iPhone standby mode iOS 17.1.
So, I am here to guide you through a step by step guide on how you can use standby mode on iOS 17.1 compatible devices without any hassle. Let’s get started!
See Also: How To Use And Customize Standby iOS 17?
What is Standby mode iOS 17.1?
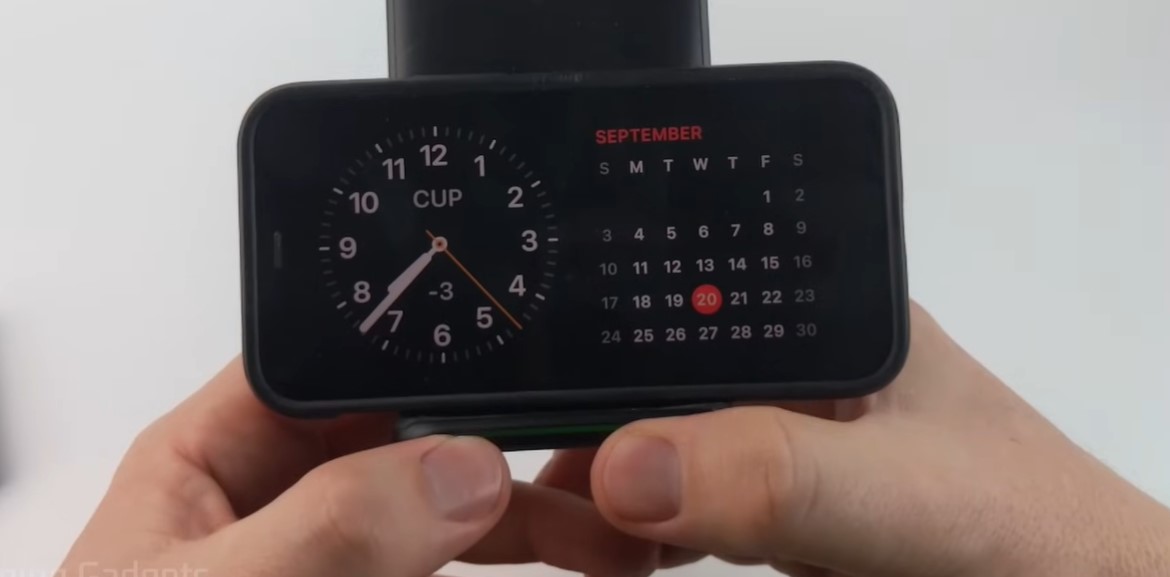
Standby mode is a new feature that was release with iOS 17 update. This feature turn your iPhone into a smart display when it is charging and positioned in the landscape mode.
This feature is compatible with all the devices that supports iOS 17 software update. However, the standby mode’s always on feature is limited to iPhone 14 pro models and later.
What’s the difference you may ask, well if your phone has an always-on display, your StandBy widgets will run without interruption. For older phones, you’ll have to tap the screen when you want to see what’s going on.
See Also: Why Is My StandBy Red iOS 17?
How To use iPhone standby mode 17.1?
Activating StandBy Mode
1. Make sure that your iPhone is locked by pressing the side or top button once.
2. Connect your iPhone to a power source using either a MagSafe, Qi wireless, or Lightning cable charger.
3. Position your iPhone horizontally in landscape orientation, with the charging port at the bottom.
4. Tilt your iPhone upwards between 30-60 degrees so it is angled and not flat on the surface.
5. After a few seconds, the StandBy mode UI will activate and appear on your iPhone’s lock screen.
Customizing Widgets Screen
1. When StandBy mode is active, locate one of the widget stacks on the left or right side of the screen.
2. Hard press and hold your finger on the widget stack for 2 seconds until you feel a haptic tap.
3. Face ID will initiate and once unlocked, the widget stack will zoom in and enter edit mode.
4. Tap the (+) plus icon at the top left to browse and add widgets to the stack.
5. Tap the gear icon at the top right to toggle Smart Rotate and Widget Suggestions on or off.
6. Drag widgets up or down to reorder them.
7. Press the X icon on any widget to remove it from the stack.
8. When finished customizing, press Done at the bottom right.
Changing Photo Themes
1. When StandBy is active, locate the Photos screen.
2. Hard long press on the photo for 2 seconds until you feel a haptic tap.
3. Once Face ID unlocks your iPhone, you can swipe left or right to browse different photo themes.
4. Tap the (+) icon at the top left to add specific albums to the themes.
5. Tap the eye icon on any theme to hide it from the rotation.
It’s that simple! That’s it folks, these are all the customization options that you can use for the standby mode. You can make use of this feature as a nightstand besides your bed as well. Let me know what do you think about this feature.
If there is any confusion regarding the usage of the standby mode in iOS 17.1, feel free to ping us through the comment section down below and we will surely get back to you with a solution.Until next time, with another topic. Till then, Toodles.