
Apple is known for revolutionizing its features and functionalities. This includes syncing the Wi-Fi passwords across multiple Apple devices, including iPhone and Mac. So, the next time a friend comes around and asks for your Wi-Fi password, you can easily share that without any hassle at all.
A few simple clicks should allow you to transfer your Wi-Fi password from your iPhone to the Mac, which is quite promising. It also works the other way round, which is fun too.
But, how do you do it? We will talk more about that in detail in this article.
Apple ID and the Contact App
If you want to share the Wi-Fi password from an iPhone to a Mac and vice versa, you must have your Apple ID saved into the other individual’s Contacts app. It can be the other way around too.
However, if you are familiar with the other person, and you know them, chances are that you already have these saved, so you shouldn’t have to go over them all over again.
You can directly move over to the “Send or Receive Wi-Fi Password” in that case. However, for the individuals who don’t have the Apple ID saved, here’s what you have to do:
On iPhone
- Open the Contacts app on your iPhone
- Tap on the Add icon that’s present in the top-right corner of the screen
- Tap on Add email and then enter the Apple ID
- You might have to fill in some additional details and that’s it
- Once that’s over, click on Done
On Mac
- Open your Mac and then go to Finder and then navigate to Applications
- Under that, open the Contacts app
- Tap on the Add icon and tap on New Contact
- Add the Apple ID of the person you want to share the Wi-Fi password with
- Tap on Done
Steps to Share Wi-Fi Password from iPhone to Mac
Now that you have the Apple ID saved, all you have to do next is follow the steps to share the Wi-Fi password. It’s simple and can be done within a few minutes.
- Connect your iPhone to the Wifi network
- Open Mac’s menu bar and go to Wifi’s status menu
- Select the Wifi that your iPhone is connected to
- Request the wifi password
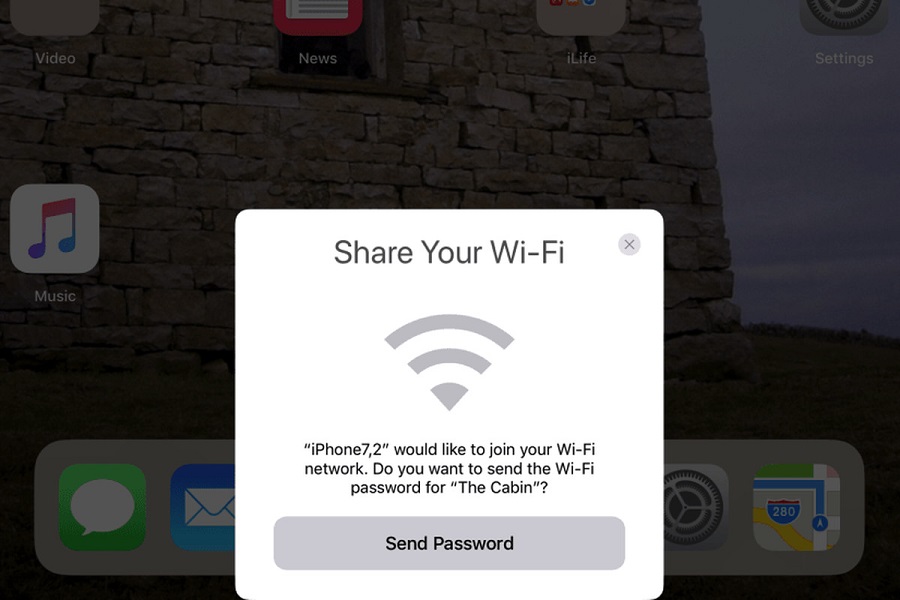
- You will get a notification as “Wifi Password”. Tap on it and tap on Share Password
- You have to wait for a few seconds for the iPhone to share the password to the Mac
- Once finished, tap on Done
What About Sharing Passwords the Other Way Around?
So, we discussed sharing the Wifi password from the iPhone to Mac. What about the other way around? The steps are simple and pretty similar. Follow the steps:
- Connect your Mac to the Wifi network
- On your iPhone, go to Settings and then to Wifi
- The wifi password notification will pop up on the top corner of the Mac’s display
- Click on Share
- The connected iPhone should receive the shared password and connect to the Wi-Fi network immediately
What can you do if you Still Can’t Share the Wi-fi Password?
If the above password sharing doesn’t work, there could be certain lingering issues either in the iPhone or Mac. Your work is to identify the issue and then fix it.
Following are some of the fixes you can consider:
- Activate the Bluetooth option on both the iPhone and Mac
- Unlock the sending device, be it the iPhone or the Mac
- Restart both the devices to fix any software or bug issues
- Bring the devices nearby for better processing
- Update the system of both the devices – iPhone and Mac
- Ensure that the contact card is updated on the iPhone and Mac
If you can’t seem to share the wifi password even after all these fixes, your last resort is to manually share the password with the other person. We hope this guide gives you all the details about wifi password sharing from iPhone to Mac and vice versa that you didn’t know of.