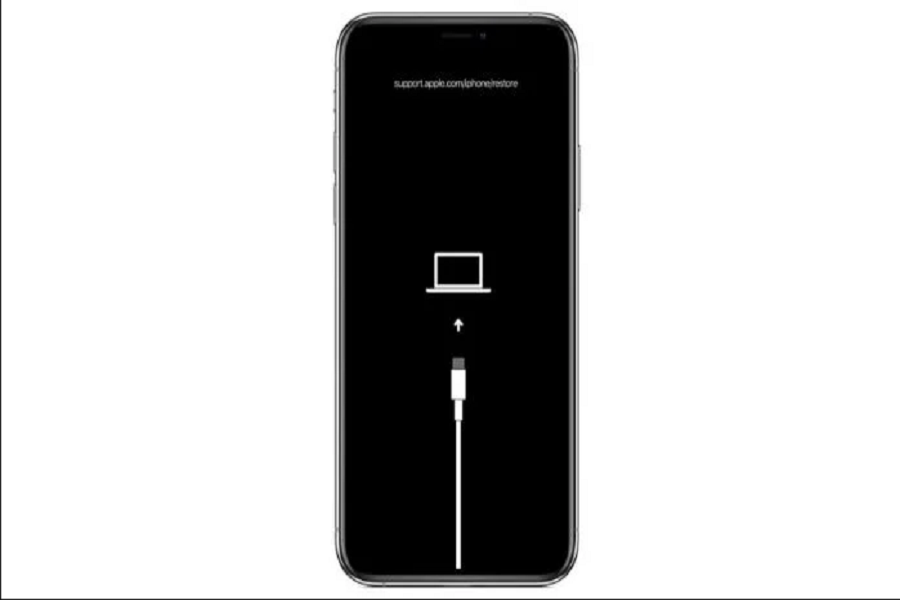
We all adore Apple products, don’t we! Apple products are known for their build quality and fantastic performance, as always. Users hardly have any complaints regarding its technical issues, which is why people tend to choose Apple products rather than Android. But sometimes iPhone may become unresponsive or cause any problems for any reason.
Whether you have an older iPhone or the latest model, it may not be immune to hardware, software, or both issues. So, you may need to put it into recovery mode if you’re having problems with your iPhone, such as freezing or unresponsiveness, or if anything went wrong during a software update. You may use your Mac, PC or laptop to put your iPhone in recovery mode. The technique for entering recovery mode on your iPhone or iPad differs depending on the model.
What is Recovery Mode?
The recovery mode enables iPhone users to update iOS to the most recent version to resolve bugs and other technical issues. Furthermore, if your iPhone becomes stuck after updating the iOS, you will be able to restore the prior version. Recovery Mode is a troubleshooting tool that links your iPhone to a computer and allows software like Finder or iTunes to analyse and repair the issue.
NOTE: Putting your iPhone into recovery mode may potentially result in a factory reset, which means all of your data will be deleted and you will have to set it up again. So be prepared to lose all your data in the process.
Reasons to Boot Your iPhone into Recovery Mode
• iPhone’s display stuck on the Apple logo.
• During an iOS upgrade, the phone gets stuck while rebooting.
• iPhone will not switch on, turn off, or respond in any way.
• The iPhone freezes upon starting.
How to put iPhone in Recovery Mode?
Step 1: Use a USB to connect your iPhone to your Mac or PC windows.
Step 2: Open Finder if you’re on macOS Catalina or later.
Step 3: Open iTunes if you’re on macOS Mojave or earlier, or Windows.
Step 4: To enable recovery mode, press and hold buttons on your iPhone.
For iPhone 8 or later:With your phone connected to your computer, swiftly push and release the Volume Up button, quickly press and release the Volume Down button, and then press and hold the Side button until the recovery mode screen appears.
For iPhone 7 & 7 plus: When connected to your computer, press and hold the Side and Volume Down buttons simultaneously until you see the recovery mode screen.
For iPhone 6s or earlier: With your device connected to your computer, press and hold the Side or Top button and the home button simultaneously until you get the recovery mode screen.
Step 5: In Finder, choose your phone from the left sidebar.
Step 6:In iTunes, select the iPhone symbol in the upper-left corner of the window.
Step 7: You’ll be prompted to update or restore your iPhone. Click Update to try to repair your phone without losing your data.
Step 8: If the recovery process is complete but your phone is still not fixed, repeat the process but this time choose Restore.
Step 9: After you’ve completed the recovery process, your phone should automatically exit recovery mode.
Step 10: Restart it and configure it.
Step 11: If recovery mode didn’t work and your iPhone is still broken then you should contact Apple support or go to the nearby Apple store for further guidance.
Until next time, with another topic. Till then, Toodles.


