


Hard-drive showing indications of potential inaccessibility or a degradation in performance of your Mac Operating system is regarded as failing hard-disk. However, failing hard-drive shows certain indications as shown below.
Symptoms of Failing Hard-drive
- Corruption of the file system
- Major slowdowns
- Frequent system restarts
- Frequent error messages
- System crashes
- Bad sectors preventing data access
- Failure of the system to boot
If you come across any of the above – mentioned symptoms, it is high time you recover data from the failing hard-drive.
Nevertheless, if you have a failing hard-drive on Mac and wondering how to save your data from it, this article is for you. Here we will guide you will effortless solutions on how to create a recovery drive for your failing hard-drive on macOS
Note – We recommend you to use anexternal storage device or USB with good amount of storage space to format/ backup the failing drive.
How to Create a Recovery Drive to Rescue your Failing Mac with
- Backup your data Using Disk Utility
- Create a bootable drive for Recovery
Restore the Backed Data using Disk Utility
Note – Before going ahead with formatting external storage device, we recommend you to try Disk Utility to rescue your data from failing hard-drive. This method is only applicable for hard-drive which has not incurred physical damage and is accessible.
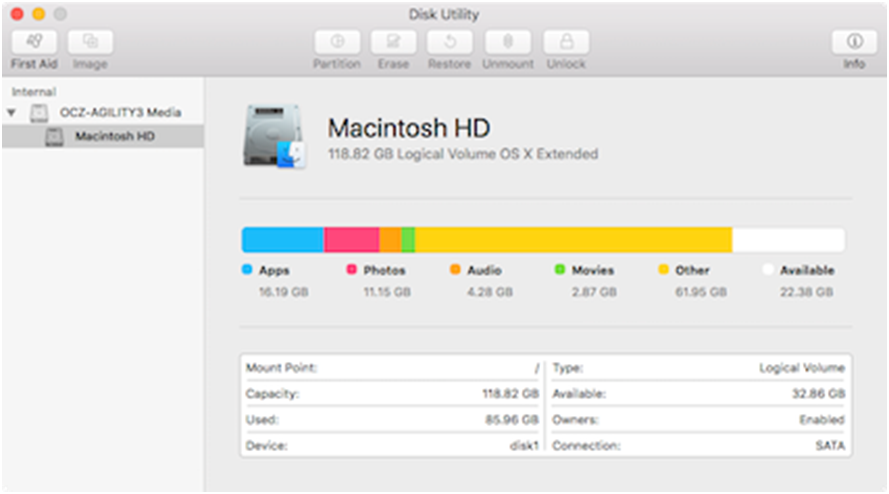
- Go to Disk Utility app on your Mac, choose View > Show All Devices.
- Select the desired volume you want to restore, then press the Restore button.
- This is the volume that will be erased and becomes the exact copy from the failing hard-drive.
Copy the Data on Working Hard-Disk
- Connect the new working hard-drive
- Go to Disk Utilities in working hard-drive
- Note – You can copy the recovered partition to accessible and healthy hard-drive to back up your data
- Click the Restore pop-up menu, then choose the volume you want to copy from the failing hard-drive.
- Click on the Restore button, andclick Done.
How to Create a Bootable Drive for Recovery with External Storage Device (h2)
- Re-format the External storage device or USB
- Create a bootable disc
- Re-install macOS
- Access the macOS Recovery
- By using Reliable Mac Recovery Utility like Remo Mac Data Recovery
Re-format the External drive or USB
In order to create a bootable drive, follow the below mentioned steps
- Go to the menu and Click on Utilities
- Open Disk Utility and select the USB drive and click on Erase option
- Rename the USB drive to desired file name
- Format the USB with APFS or HFS file system
- Click Done
Once you have completed with formatting the external storage drive, you will need to download the desired macOS operating system like macOS Monterey, Big Sur, Catalina and any other version. Go to Mac App store to download your desired Operating system
Create a Bootable Disc
- After connecting the USB drive to the bootable disc
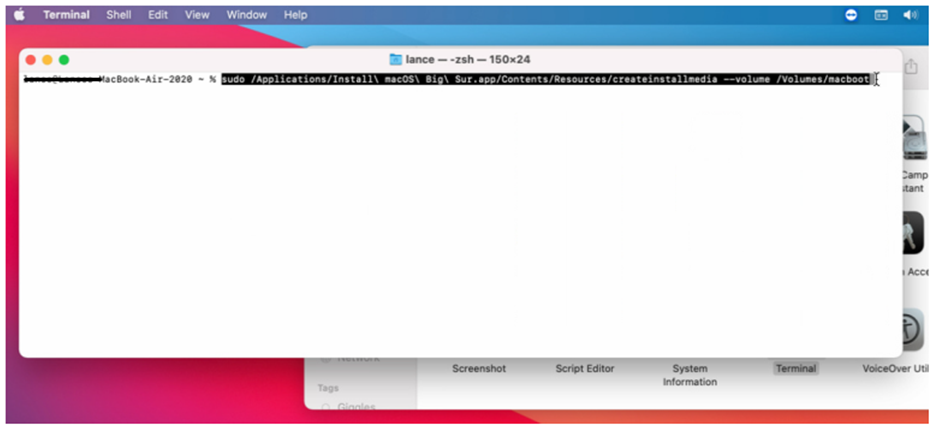
- Open Mac Terminal prompt
- In the listed commands below replace the ‘My Volume’ with the name of your external storage device or USB drive
- Clickon Done
- Note – After implementing the below listed procedure, you will be asked to login to your macOS account for verification and rooting of the operating system.
- Type the password and then press Return.
- Terminal tells you that it needs to erase the volume. Type Y to confirm and press Return.
Terminal tells you that the disk is being erased and displays the progress. The program then indicates that the necessary files are being copied to the disk. Then, Terminal tells you that it’s making the disc bootable. Finally, it indicates that the volume for your external storage device or USB now has the same name as the installed failing hard drive. Eject the Storage device once done.
Re-install the macOS
- Connect the external drive Storage Device
- Hold on the Option keys
- You will see a screen displaying your bootable volumes
- Select the USB drive and external storage device and Press Return
- The macOS will reboot
Access the macOS Recovery
- Go to the Apple menu and select Restart, then hold down the Option key while your Mac reboots.
- Go to the volume and click on it for your bootable USB drive, then click the up arrow or press Return.
- After your system restarts, you will see macOS Recovery screen.
- To check your unbootable hard drive, open Disk Utility.
- Click your hard drive volume and select First Aid.
- This will look for errors and repair any that it finds. Click the Run button to trigger the scan and repair.
- Click done when the process finishes and return to the macOS Recovery screen.
The article summarizes on two effective methods to Create a Recovery Drive to Rescue your Failing Mac. If you have any further queries regarding performing the recovery or the article, make use of the comment section below
I am a tech-savvy Enthusiast and tenured Content Analyst- Senior Editor. My expertise is on developing informational content articles regarding recovery and trouble-shooting of Windows and macOS trending topics and user queries. With 8+ years of Experience in the Data Recovery industry.