


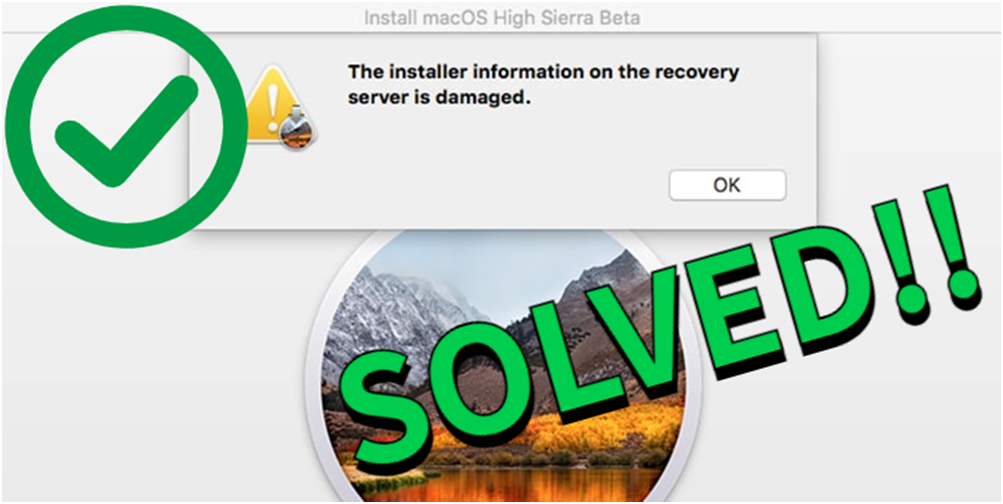
Picture this: You’re all set to reinstall your macOS, but suddenly, you’re hit with the frustrating “the installer information on the recovery server is damaged” error. Annoying, right? However, worry not. In this guide, we’ll discuss the reasons behind this error and explore six proven methods to resolve it easily. Let’s get your macOS reinstallation back on track!
Part 1: What Causes “The Installer Information on the Recovery Server Is Damaged” Error?
When trying to install the lastest macOS on your Mac, you might see the error message “the installer info on the recovery server is damaged.” This issue can block the installation and happens due to reasons such as:
- Post-Sierra, Macs use the new APFS format. If your Mac doesn’t have APFS, that could be why you can’t reinstall macOS.
- System files can become corrupted due to bugs, power failures, disk errors, or faulty hardware preventing macOS reinstallation.
- If your Mac’s date and time don’t match its connected server, you might get the installer error.
- Unreliable connections can result in incomplete or corrupted installer data.
Part 2: How to Fix Installer Information on the Recovery Server Is Damaged?
We’ve covered why the “installer information on the recovery server is damaged” issue happens. Now, let’s talk about how to fix it with step-by-step details:
Fix 1: Check Apple Services Status
The quickest way to determine if the “Mac recovery server is damaged” problem is on your side, or Apple’s is to inspect their service status. Here’s how to do it:
Step 1: Open your web browser and head to Apple’s official site.
Step 2: Click on “Support” and go to the “System Status” section. There, you’ll find the status of all Apple services.
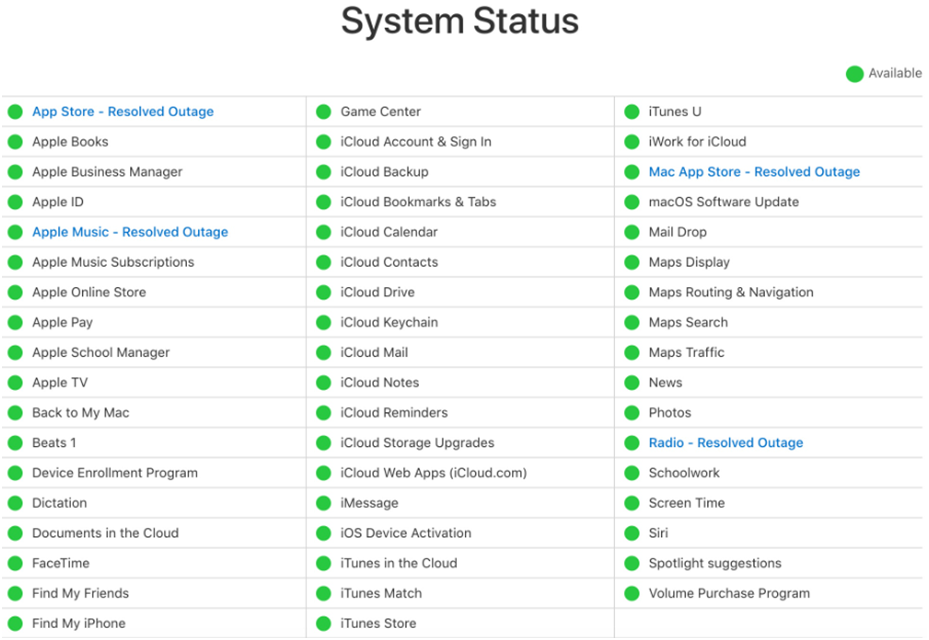
If their service is down, just wait for them to fix it. But if everything’s normal, you can move on to other troubleshooting steps.
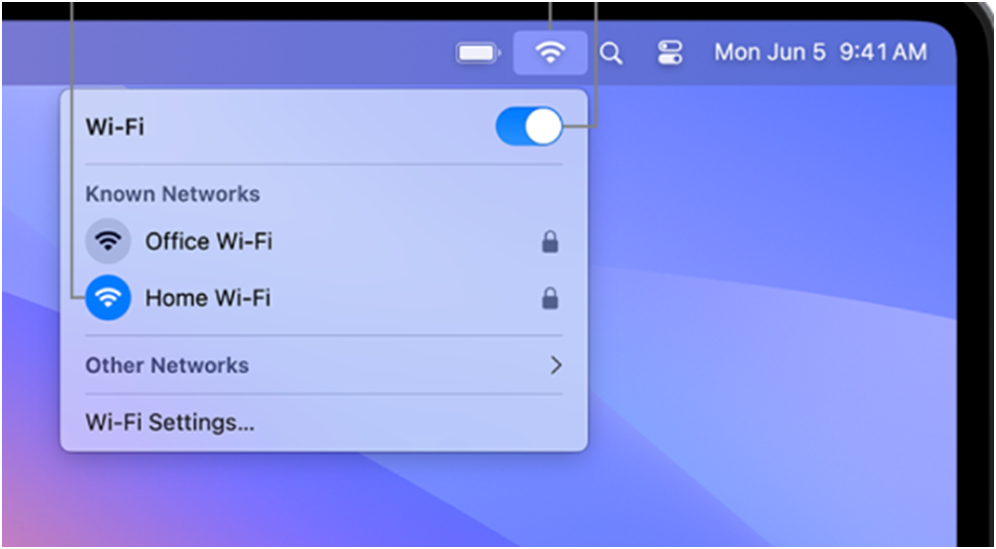
Fix 2: Check Internet Connection
Having a reliable and fast internet connection is vital to avoid errors like “the installer information on the recovery server is damaged” when reinstalling macOS. If you use Wi-Fi, confirm your connection to the network, and if there’s no internet access, there could be an issue with the network itself. Additionally, it’s important to check that all cables are properly connected, especially when dealing with an external modem.
Fix 3: Reinstall macOS in Recovery Mode
Reinstalling macOS in Recovery Mode can fix the “installer information on the recovery server is damaged” error. It gives your system a fresh start, clearing out problems caused by corrupted system files, expired certificates, or incompatible hard drive formats. However, reinstalling macOS will also wipe out your drive.
So, if you forgot to backup your Mac data, or if your backup is lost somehow, consider using 4DDiG Mac Data Recovery. It is a reliable tool that can successfully retrieve your lost files, whether your Mac drive is corrupted, formatted, virus-infected, or you’ve lost a partition. Check out it’s fabulous features:
Here’s how to use this tool to recover lost backup from your Mac:
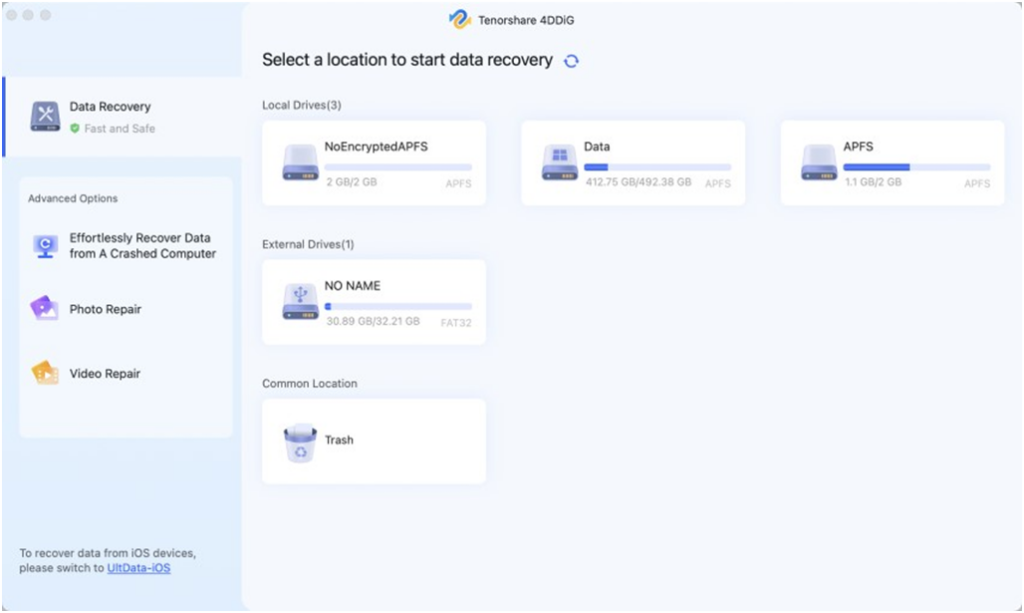
Step 1: Pick a Location
Launch the tool on your Mac and pick a location for backup recovery. Hover your mouse over the chosen location. A “Scan” icon appears in the lower right corner. Click it to initiate the search for lost backup.
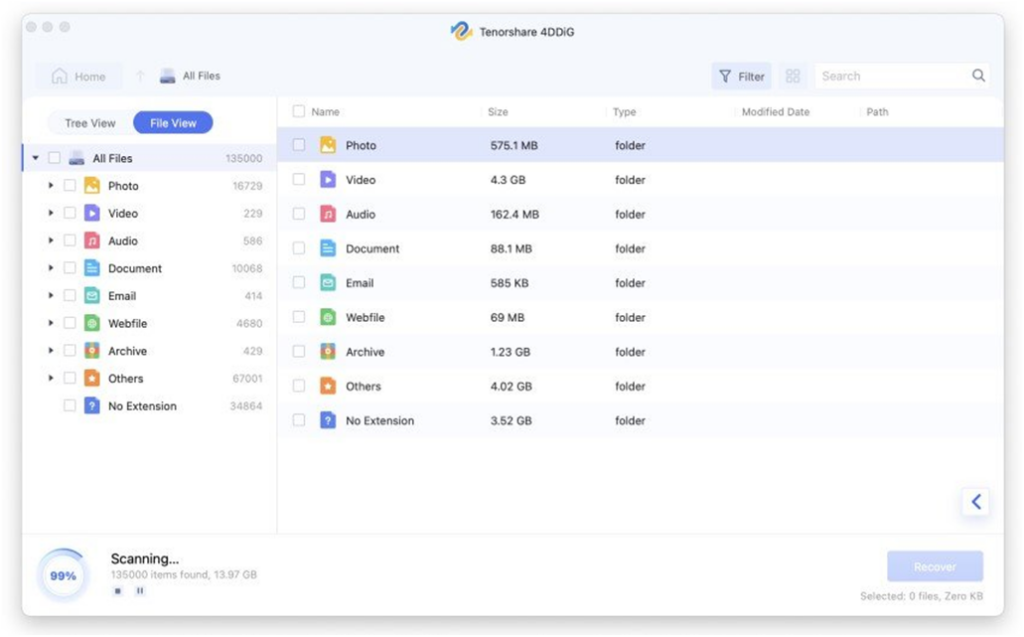
Step 2: Scan and Preview Backup Files
The scanning process might take a bit. Once the scan finishes, you can check specific file types for more info.
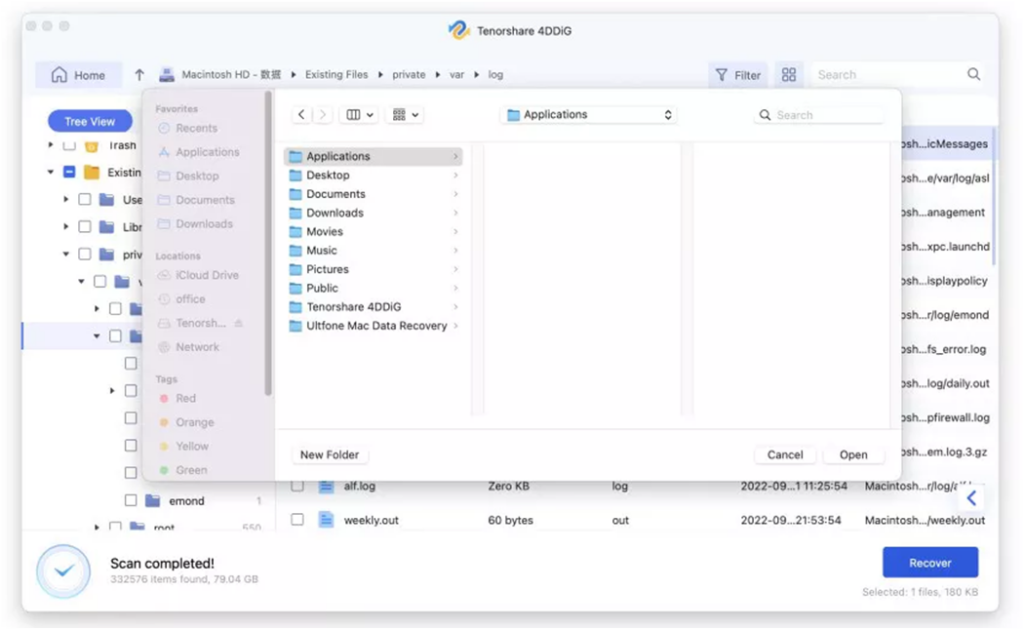
Step 3: Save Recovered Backup
Click “Recover” and choose where to save the found backup. Remember, it’s not a good idea to keep it to the same partition where you lost it to avoid permanent data loss.
Once you’ve recovered your data, it’s time to fix ‘the installer info on the recovery server is damaged’ by reinstalling macOS. Here’s what to do:
Step 1: First, back up your Mac data to cloud storage, then turn off your device.
Step 2: Press the “Command + R” keys on Intel-based Macs to boot into Recovery Mode. For Apple Silicon Macs, hold the “Power” key.
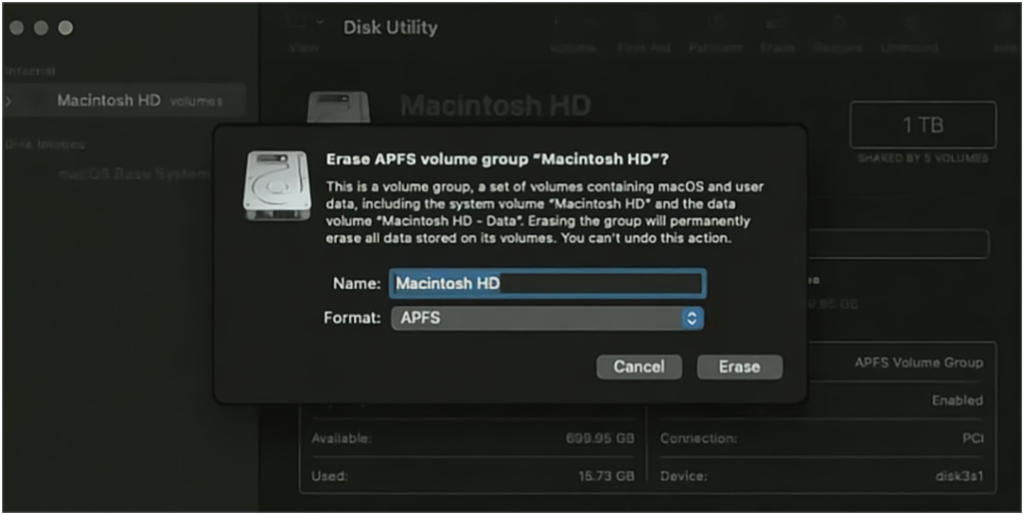
Step 3: Choose “Disk Utility.” Now, you’ll see a list of available disks and volumes on the left-hand side. Pick the your Mac’s internal drive(usually labeled as “Macintosh HD” or similar) and hit “Erase.”

Step 4: In the window that pops up, choose APFS for disk format amd click “Erase” to confirm. Once the disk formatting is complete, return to the previous window and try reinstalling the macOS.
Fix 4:Adjust Date and Time
At times, the “Mac recovery server is damaged” issue stems from expired certificates. That’s why your Mac’s time and date should match the server it’s linked to. If you suspect this, make sure your date and time settings are in sync. Here’s how:
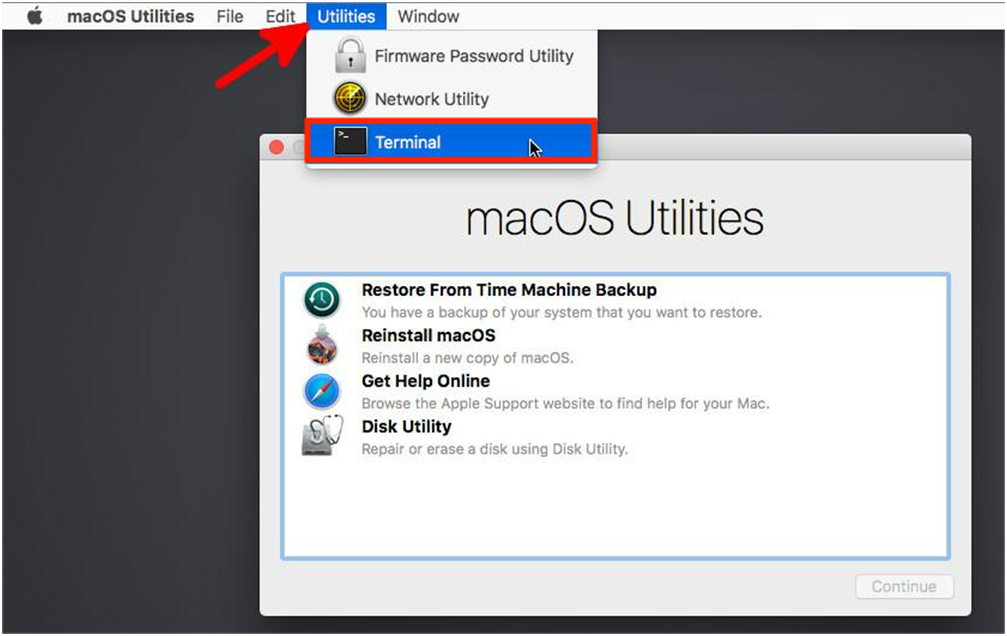
Step 1: Boot your Mac into “Recovery Mode,” go to “Utilities,” then select “Terminal.”
Step 2: Type “sudo ntpdate -u time.apple.com.” Press “Returun.”

Step 3: If the above steps don’t work, you can also manually check and set the time of your Mac. Firstly, go to “Terminal” again. Type “date” and press “Return.”
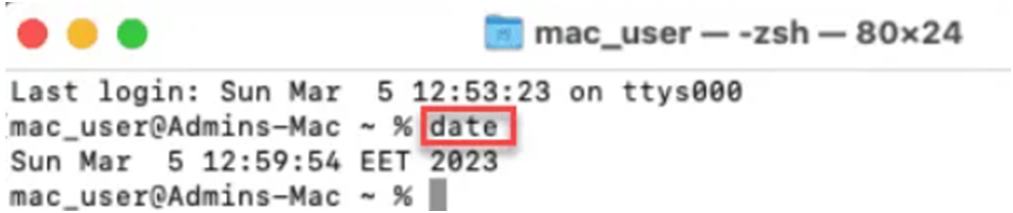
Step 4: Type “date {month}{day}{hour}{minute}{year}” and hit “Return.” For example, if you want to set the date to March 5, 2023, at 11:15 AM, you would use this command:

Fix 5: Use Terminal
Try downloading the complete macOS installer with Terminal to resolve the “the installer info on the recovery server is damaged” error. This means you’re grabbing a new set of all the system files necessary for macOS installation by downloading the full macOS installer. Just perform the following steps to grab it:
Step 1: Launch Terminal from the “Utilities” in “Recovery Mode.”
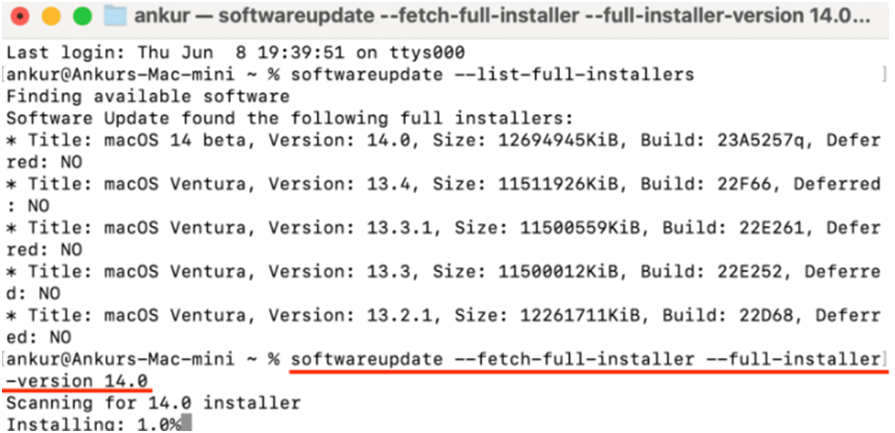
Step 2: Type in “sudo softwareupdate –fetch-full-installer [OS version].” Hit “Enter” and wait for the complete macOS installer to download.
Fix 6: Create a macOS Bootable Installer
In case you can’t access Recovery Mode or the internet to fix the “the installer info on the recovery server is damaged,” create a macOS bootable installer. Here’s how:
Step 1: Get your macOS installer files from the App Store. Connect an external drive with at least 32GB of space.
Step 2: “Disk Utility,” go to the “View” menu, and click on “Show All Devices.”
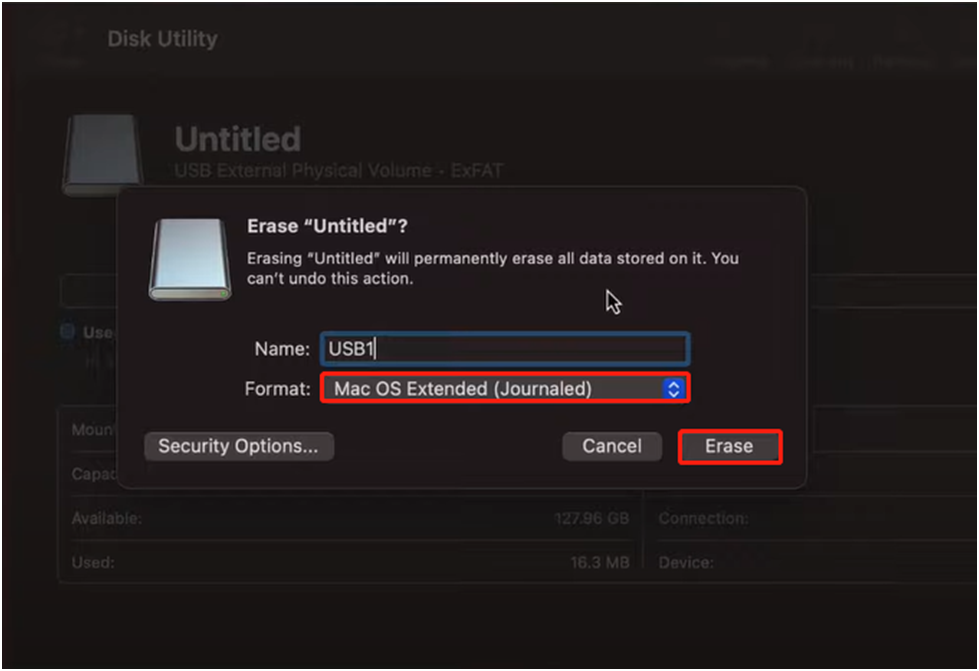
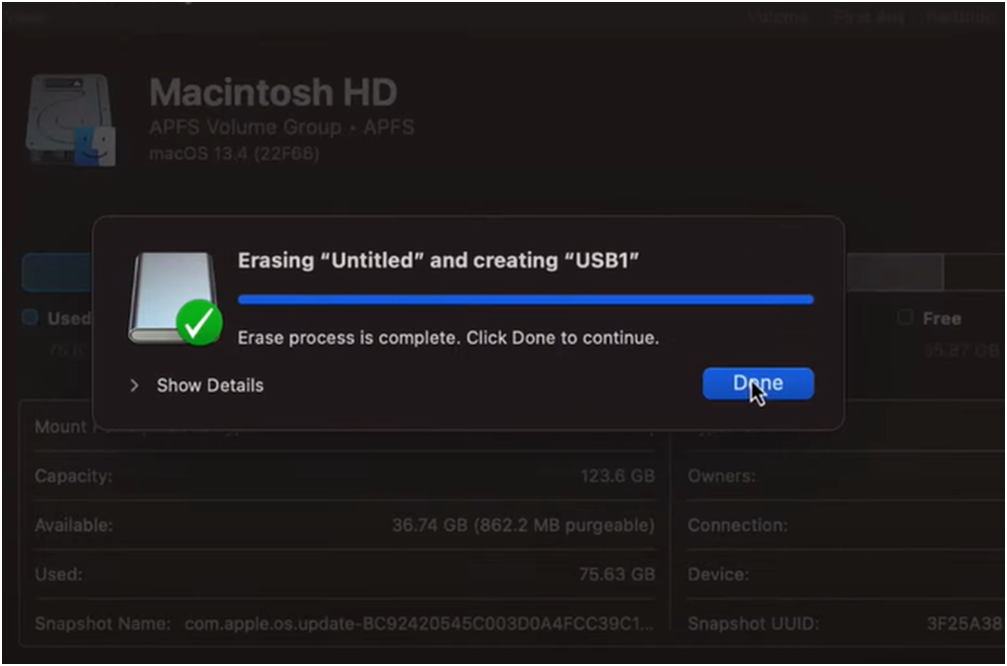
Step 3: In the sidebar, select your external drive. Click “Erase,” choose “Mac OS Extended (Journaled)” as the format, and select “GUID Partition Map” as the scheme.
Step 4: Wait for “Disk Utility” to create the partition and set up the drive. Click “Done.”
Step 5: Now, open “Terminal” and copy and paste the command “sudo /Applications/Install\ macOS\ Sonoma.app/Contents/Resources/createinstallmedia –volume /Volumes/USB1” into Terminal. (This command is for macOS Sonoma users and USB1 is the name of the disk that was just formatted). Press “Enter.”
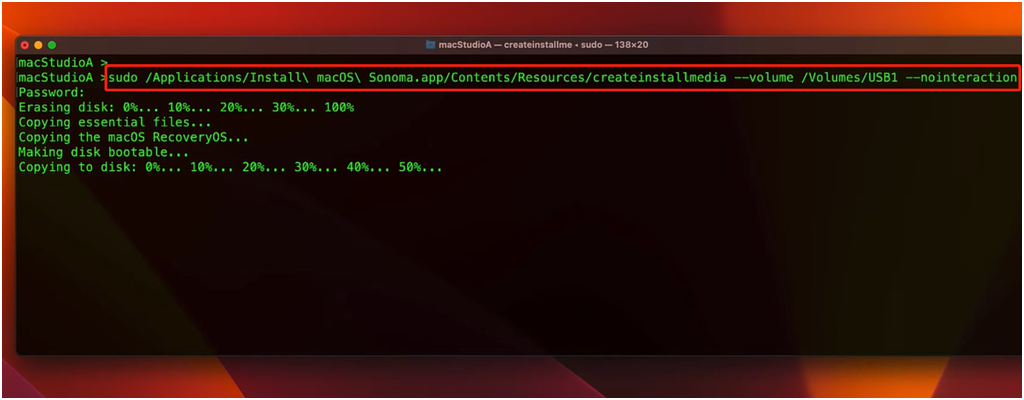
Step 6: The process may take a while, with progress updates in “Terminal.” When it’s done, you’ll see “Copy complete” and “Done” in Terminal.
Now, you can say goodbye to the worries about the “Mac recovery server is damaged” problem.
Conclusion
The “the installer info on the recovery server is damaged” error can blindside you when you’re eager to restore your macOS. However, we’ve uncovered the causes and provided six potent solutions.
Just remember, when reinstalling macOS in recovery mode, having a backup is essential for data safety. If you’ve forgotten or lost your backup, don’t worry—4DDiG Mac Data Recovery is your trusty ally. It’s an all-in-one data recovery solution with a high success rate, so your data can return triumphantly.