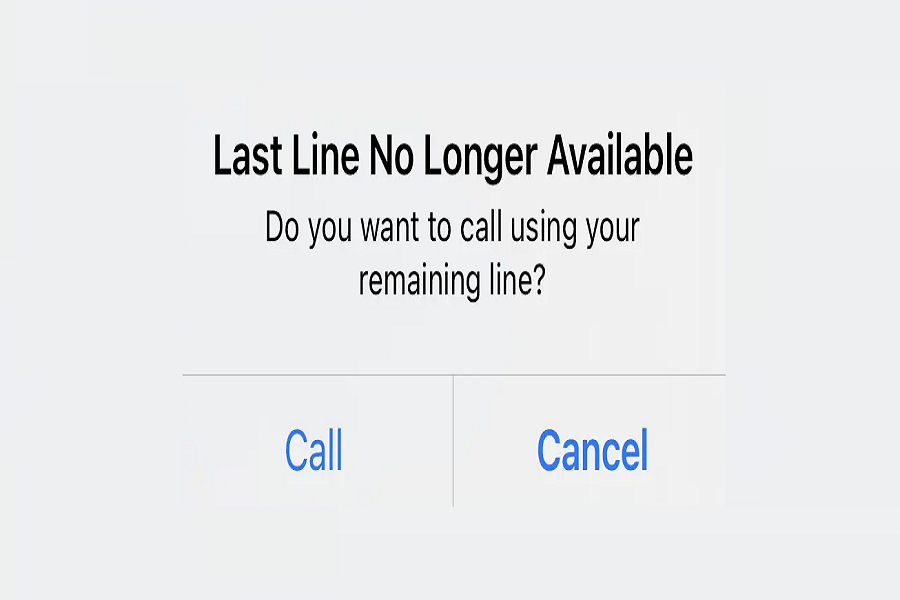
The iPhone 13 is a powerful, feature-rich device offering a seamless user experience. As an iPhone 13 user, it is a joy to use this futuristic device. But sadly, this powerful device also gets users into the problem. We are discussing The Last Line No Longer Available issue on iPhone 13.
Mostly this annoying problem pops up while making a phone from iPhone 13. There are many other users across the world facing the same issue. Since the number of users across the globe started reporting this issue, we have come to help with the solutions to get rid of The Last Line No Longer Available iPhone 13 issue. This article will explore these solutions in detail, addressing possible causes and providing step-by-step instructions on fixing the “Last Line No Longer Available” error on your iPhone 13.
Methods to Fix the Last Line No Longer Available on iPhone 13
1. Turn on/off Airplane Mode
Airplane mode can sometimes disrupt network connections, leading to call-related issues. Follow these steps to turn it on and off:
- Open the Control Center by swiping down from the top-right corner of the screen (iPhone X or later) or from the bottom (iPhone 8 or earlier).
- Tap the airplane icon to enable Airplane mode.
- Wait a few seconds, then tap the airplane icon again to disable Airplane mode.
2. Restart Your iPhone
Restarting your iPhone can resolve temporary software glitches that may be causing the “Last Line No Longer Available” error. Here’s how to do it:
- Press and hold the power button (located on the side or top of the device) and either volume button simultaneously.
- Drag the “Slide to power off” slider to turn off your iPhone.
- After a few seconds, press and hold the power button again until the Apple logo appears.
3. Clear Your Recent Call List
Clearing your recent call list can help eliminate any corrupt or conflicting call logs that might be causing the error. Follow these steps:
- Open the Phone app on your iPhone.
- Tap the “Recents” tab at the bottom of the screen.
- Swipe left on any entry, tap “Delete” to remove individual call logs, or tap “Clear” at the top-right corner to remove all recent calls.
4. Switch Phone Lines Manually
If you’re using a dual SIM setup and experiencing difficulty detecting the default or preferred line, manually switching phone lines can help. Here’s how:
- Open the Settings app on your iPhone.
- Scroll down and tap “Cellular” or “Mobile Data,” depending on your iOS version.
- Tap “Cellular Plans” or “SIM Applications.”
- Select the desired line or SIM card for making calls.
5. Reinsert the SIM Card
A loose or improperly inserted SIM card can cause connectivity issues. Try removing and reinserting the SIM card by following these steps:
- Locate the SIM card tray on the side of your iPhone (consult the user manual for exact location).
- Use the SIM eject tool or a paperclip to gently push into the small hole next to the tray, releasing it.
- Remove the SIM card from the tray.
- Check the SIM card for any visible damage or debris. If necessary, clean it gently with a soft, lint-free cloth.
- Place the SIM card back into the tray, aligning it with the provided notch or corner.
- Insert the tray back into the iPhone until it clicks into place.
6. Update Your iOS Device
Keeping your iOS device updated with the latest software is crucial for optimal performance and bug fixes. To update your iPhone’s iOS:
- Open the Settings app on your iPhone.
- Scroll down and tap “General.”
- Select “Software Update.”
- If an update is available, tap “Download and Install.”
- Follow the on-screen instructions to complete the update.
7. Check Your Network Connection
A stable and reliable network connection is essential for making calls without interruptions. Here’s how to ensure your network connection is functioning properly:
- Ensure you are within range of a cellular network or connected to a stable Wi-Fi network.
- Open a web browser or any app requiring an internet connection to check if your network works.
- If you’re connected to Wi-Fi, try turning it off and using cellular data or vice versa to see if the issue persists.
8. Reset Network Settings
Resetting network settings can help resolve network-related issues that may be causing the “Last Line No Longer Available” error. Follow these steps:
- Open the Settings app on your iPhone.
- Scroll down and tap “General.”
- Select “Reset.”
- Tap “Reset Network Settings.”
- Enter your passcode if prompted, then confirm the reset.
9. Disable Dual SIM Mode
If you’re using a dual SIM setup and experiencing difficulties with the “Last Line No Longer Available” error, disabling the dual SIM mode may help. Here’s how:
- Open the Settings app on your iPhone.
- Scroll down and tap “Cellular” or “Mobile Data,” depending on your iOS version.
- Disable the “Dual SIM” or “Dual SIM and eSIM” option.
10. Contact Apple Support
If you have tried all the above solutions and the “Last Line No Longer Available” error still persists, it is recommended to contact Apple Support for further assistance. They have trained professionals who can provide specialized guidance and troubleshooting tailored to your issue.
Conclusion
The “Last Line No Longer Available” error on iPhone 13 models can be annoying when you ca unable make calls. However, there are various solutions available to fix this issue, including turning on/off Airplane mode, restarting your iPhone, clearing the recent call list, switching phone lines manually, reinserting the SIM card, updating your iOS device, checking your network connection, resetting network settings, disabling dual SIM mode, or reaching out to Apple support. I hope these methods worked for you. Did it?
Remember, if you encounter any persistent issues or need personalized assistance, it’s always a good idea to reach out to Apple support for further guidance. Don’t let the “Last Line No Longer Available” error hold you back from enjoying the full capabilities of your iPhone 13.


