We are seeing the increase in use of Zoom App during the Covid-19 pandemic. Most of the MNCs, schools, colleges have started using Zoom these days. Zoom has become one of the favorite apps for video conferencing to connect with students or colleagues or clients. One of the biggest reasons for the popularity of Zoom is cross-platform support.
As many of us are working from home these days and we need to either join a meeting or arrange a meeting for our office members. So for all the Mac users, we are here with a guide to download and install Zoom on your Mac device and will show you how to make your first call. Let’s start!
How to Download Zoom on Mac
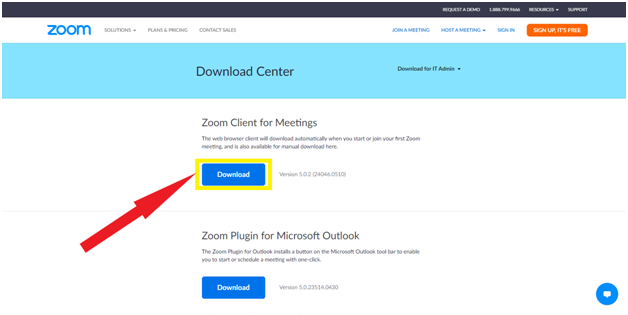
1. Click on the above link to open the official Zoom web page to download Zoom App. If the link is not working you type https://zoom.us/download in any browser.
2. Click the Download Button below ‘Zoom Client for meeting’ as shown in the image below.

3. Based on the web browser you are using to Download Zoom, you will see a pop-up asking for confirmation of downloading from the website. Click ‘Allow’ if prompted.
4. Your download will begin.
How to Install Zoom on Mac
1. Once you the file is downloaded, Double click on the downloaded file.
2. Once you double click on the downloaded, the installation process will start. Click on ‘Continue’ on the “Install Zoom” pop-up on your Mac device. Click “Continue” again if prompted.

3. Installation process should be completed by now. And you will be able to see a screen with two buttons. One option is ‘ Join a Meeting’ and second is ‘Sign In’ as shown in the image below.
How to use Zoom on Mac
Zoom basically gives you two options, one is to join a meeting which is arranged and presented by someone else, for this you don’t need to have a Zoom Account. The second option is to Schedule a meeting for which you need a zoom account. You can create a zoom account on the Zoom website and then using those credentials you can sign in the Zoom App.
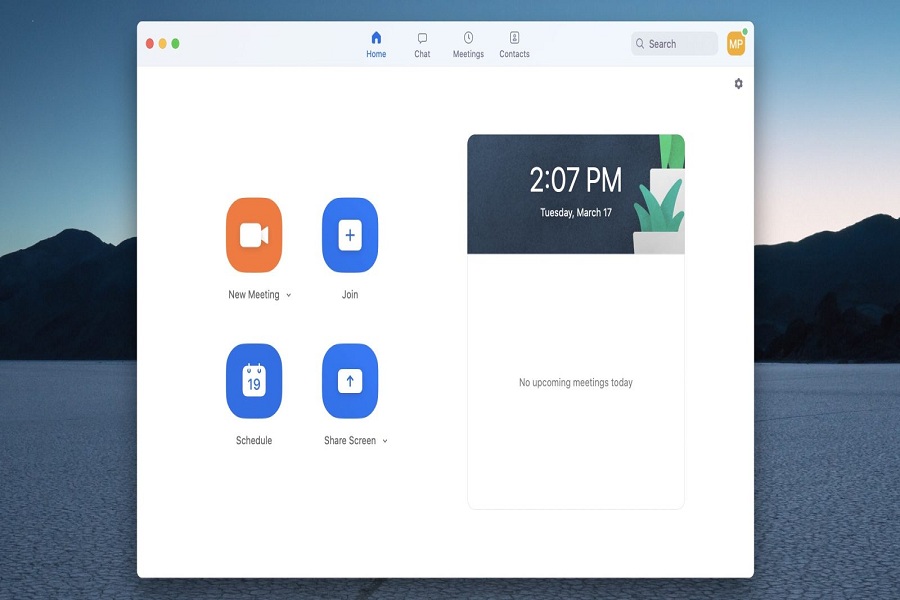
Once you are logged in, the Home screen of Zoom App on Mac has four buttons and one calendar where all your upcoming scheduled meetings are displayed. The buttons on Home Screen are New Meeting, Join, Schedule, and Share Screen.
- New Meeting
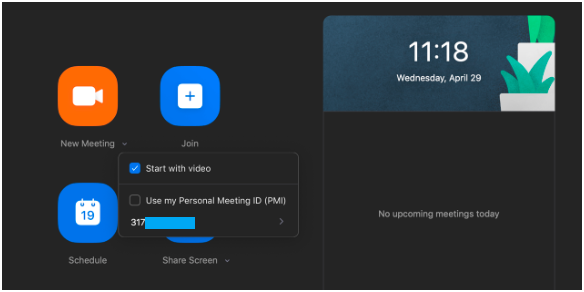
We can understand with the name itself, this option will allow you to schedule a meeting. Beside this button there is a drop-down with two options – Start with video and Use my Personal Meeting ID.
denoting that there is a drop-down menu with additional options. Clicking on the arrow gives you two choices: Start with video and Use my Personal Meeting ID (PMI) with the numberas shown in the below image.

Use my Personal Meeting ID (PMI) is mostly for instant meetings with the people who converse regularly.
- Join
This option allows you to join a meeting, the only thing that you need to join a meeting is a meeting ID.
- Schedule
This option allows you to schedule a meeting for future dates and you have scheduled the meeting, you can share the meeting invite or the meeting ID with the people you want in that meeting.
Bottom Line
So, here are all the details of Zoom App for you. You can now start using Zoom App on you Mac device with ease.


