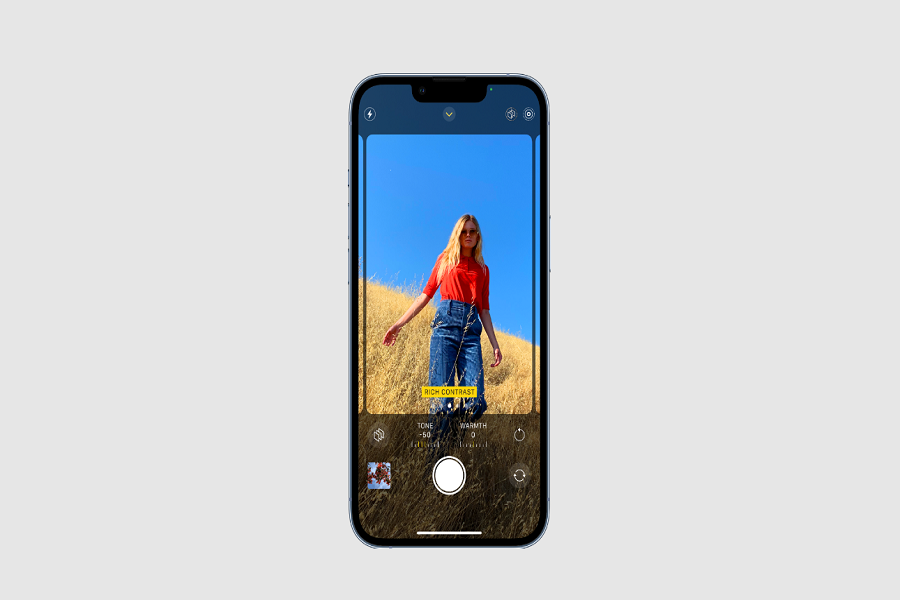
Apple announced iPhone 13 lineup recently, and it added a number of new features for photography. Cinematic Mode is one of the talked features for video recording, but many experts and users don’t know about Photographic Styles. In the following, we will look together at how you can use “Photographic Styles” on iPhone 13 series.
This new feature in the camera app allows users to add color settings to their camera before clicking a photo. Thus, users can use such stylish effects and make their photos more attractive without affecting a person’s skin tone in your photo. There are about four presets available here:
- Vibrant
- Rich Contrast
- Warm
- Cool
When you select a Vibrant preset, it captures photos in vibrant yet gives them a natural look. The Rich Contrast darkens shadows and enhances contrast and color, giving a dramatic look to your shot. On the other hand, warm add a summary golden accent to the motifs. Lastly, cool uses blue tones to achieve a cool look to your photos.
These presets work more intelligently than photo filters as they capture with certain color settings and elements rather than applying such effects after clicking a photo. In addition, the hue and warmth are different and customizable with each Photographic Style. Thus, you get the exact look you want in your photos; you can keep it during your photoshoot. Along with the rear camera, you can use these styles with the front-facing camera as well. You can add such effects to your selfies. However, you should keep in mind that you cannot remove these styles from a photo once it has been taken.
How to Use Photographic Styles on My iPhone 13 and iPhone 13 Pro Models
Photographic Styles can be used easily. Here, we have presented a process on how to use Photographic Styles on your new iPhone 13.
- Open the Camera app on your iPhone 13 Pro or iPhone 13.
- If you have never tried these photo styles before or selected the standard model for a photo, you need to swipe up the horizontal menu from the viewfinder to select photo mode. Now swipe up from the bottom of the viewfinder and select the Photographic Styles. It has an icon of three cards.
- You can swipe through these presents and see the preview applied in the scene on camera. You can see the differences you get on screen with each style.
- It is easier to customize the warmth and hue slider under the viewfinder. This is an optional feature that you can change before clicking a photo.
- You can finally click the photo when you have the perfect settings and effects for your photo.
- Now once you have used the style, this feature will be activated, and it will appear on the top-right corner of the camera app. You can change the effects and style whenever you want.
Just like other filters that you can choose for the camera app, Photographic Styles becomes a default for the next time you want to use your camera. Users can change the photo style at any time, though. Settings => Camera => Photographic Styles, here you can select the style you want.


