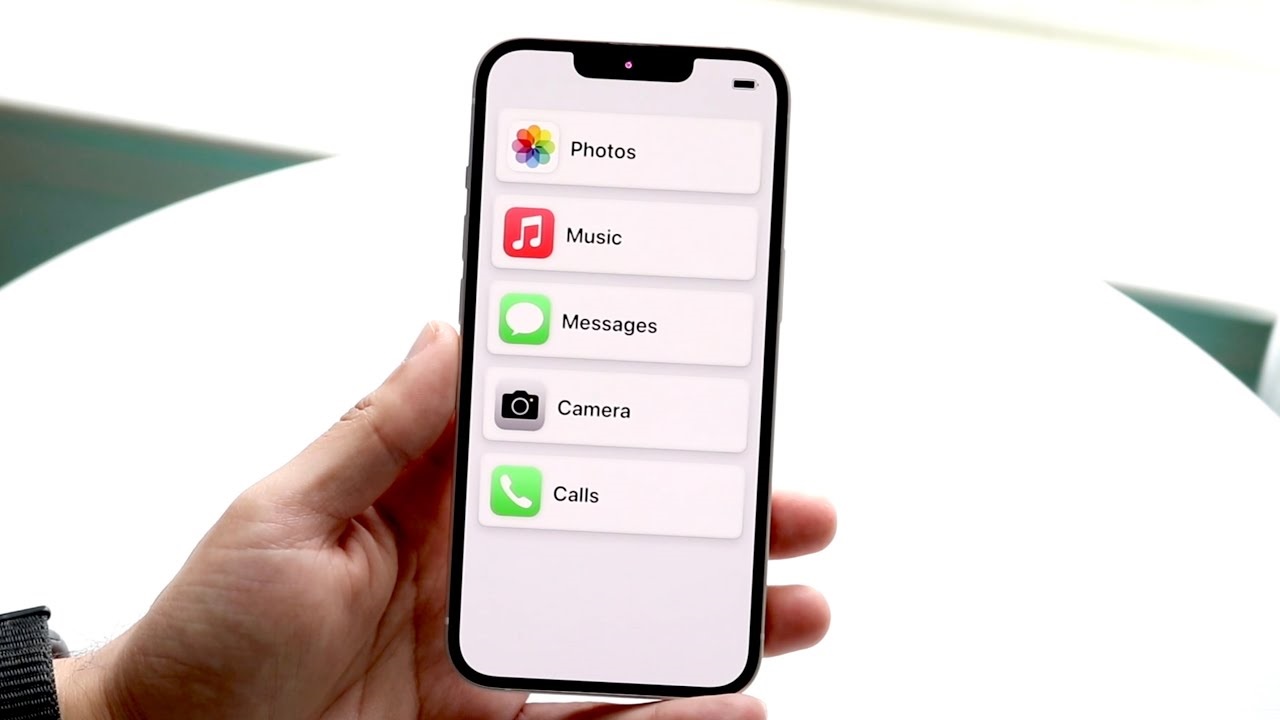
With iOS 17 has introduced a new accessibility feature called Assistive Access that allows users to customize their devices for more focused choices and a lighter cognitive load. As a trusted supporter, you can set up and configure Assistive Access to meet the specific needs of a user. Here’s how to set up and use Assistive Access.
What is Assistive Access?
Assistive Access provides a simplified interface and allows supporters to customize an iPhone or iPad for a user. It limits device usage to a curated set of apps and features that are most relevant for the user. This helps minimize distractions and makes their device easier to navigate independently.
Before You Begin Setting Up Assistive Access
- You will need the Apple ID and password for the device you are setting up. This is required during the initial setup process.
- You will also create a unique passcode that is used only for entering and exiting Assistive Access. This should be different than the passcode used to unlock the device.
- Make sure the device is updated to iOS 17 or later. Assistive Access is only available in iOS 17 and iPadOS 17.
How to Set Up Assistive Access
Follow these steps to set up Assistive Access on an iPhone or iPad:
Step #1: Access the Assistive Access Settings
- Open the Settings app.
- Scroll down and tap Accessibility.
- Scroll to the bottom and tap Assistive Access.
- Tap Set Up Assistive Access.
- Tap Continue to begin the setup process.
Step #2: Choose the Layout
You will be asked to select a layout for text and app icons. Choose between:
- Rows – Better for users who prefer text.
- Grid – Better for users who prefer visuals.
Select the layout you think works best for the user.
Step #3: Add and Customize Apps
Tap the Add button next to apps to add them to Assistive Access. Useful apps include:
- Calls – For phone calls and FaceTime. Customize who the user can call.
- Messages – Limit messaging to certain contacts.
- Photos – Customize which albums are available.
- Music – Provide access to preferred playlists.
- Books – Add selected books and audiobooks.
Customize each app’s settings and features to fit the user’s needs.
Step #4: Finish Setup
Follow the remaining setup prompts:
- Create a unique Assistive Access passcode.
- Optionally add your Apple ID as a backup for resetting the passcode.
- Tap Start Using Assistive Access or Enter Later when complete.
How to Use Assistive Access
Once enabled, use the Assistive Access passcode to enter the simplified interface. Inside Assistive Access:
- Access is limited only to the selected apps and contacts.
- There is a consistent Back button to return home.
- Additional settings like wallpaper and showing time can be customized.
To exit Assistive Access, enter the passcode or use your Apple ID for password recovery.
How to Customize Additional Settings
In the Assistive Access settings, you can also:
- Require a passcode to return to the Home Screen or open multitasking.
- Set a time limit for using a particular app.
- Disable hardware buttons like volume controls.
- Turn on Spoken Content to have text on screen read aloud.
Adjust these to further simplify the experience.
Final Words
Assistive Access gives supporters a powerful new way to customize an iPhone or iPad to meet a user’s specific accessibility needs. With thoughtful setup and curation of apps and features, it can help users stay focused, engaged, and independent. Take advantage of this great new accessibility feature in iOS 17 and iPadOS 17.


